Edit an MX-type DNS zone using WHM
Tutorials • DNS | dns | zone | whm | mxIn this article we will present the necessary steps to edit an MX-type DNS record using WHM
by Mihai BobriucViews 589Updated now 1 yearPublished 16/08/2022
Introduction
- The Domain Name Service (DNS) service converts human-readable domain names (for example: example.com) to computer-readable IP addresses (for example: 192.0.32.10). DNS relies on the "DNS zones" that exist on the server, to convert the domain name to IP addresses.
- WHM offers the ability to modify an MX-type DNS record. This functionality is provided by DNS Functions, more precisely MX Entry Editor.
Requirement
- WHM credentials. This data can be found in the management email of the reseller account or VPS with cPanel/WHM.
Steps
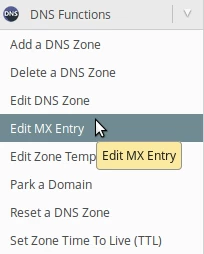
- After logging in to the WHM panel on the left side of the page we will go to the section DNS Functions and we will click on MX Entry Editor. Alternatively, we can search for this menu using the search field in the upper left.
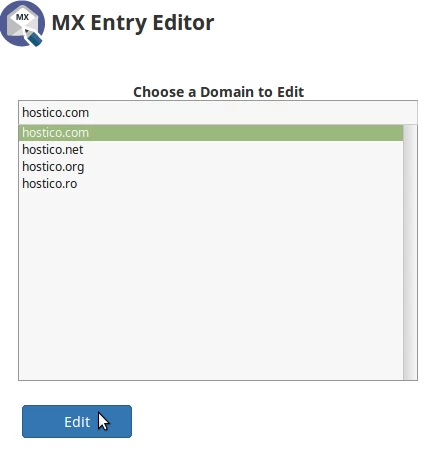
- On the next page we will choose the domain for which we want to make the changes.
- In the following page at the top we will be able to choose where we want to route the emails:
Automatically Detect Configuration - the configuration is automatically detected by the server.
Local Mail Exchanger (the email server used is local) - the email server used will be the local one
Backup Mail Exchanger - the email server used will be the external one, but if the external server is unavailable, the local one will be used.
Remote Mail Exchanger - the email server used will be an external one, according to the MX records. - At the bottom of the page to the section MX Entries we will be able to add new MX records and modify or delete existing ones. If we want to direct the emails to another mail server, we will add the related MX records. The table with the existing MXs will contain the following columns:
TTL - time to live
Priority - mail server priority
MX Destination - the address of the email server.
To add a new record we will click on Add Another MX Entry Field. In the row that will appear we will be able to add the information of the mail server.
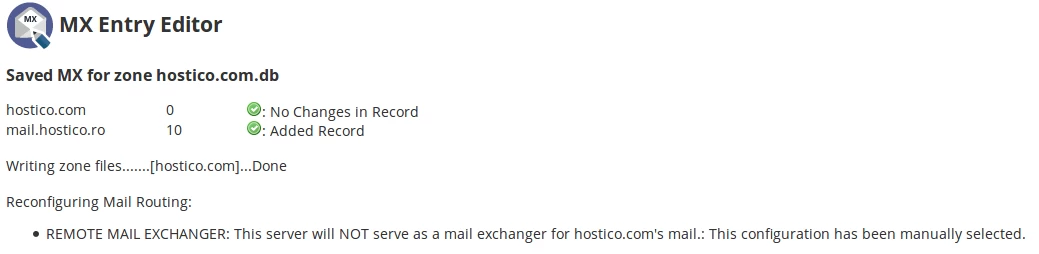
Once the routing and MX records have been set, we will click on the Save button at the base of the page to confirm the settings.

- If everything went smoothly we will be greeted by a successful message, as in the image below.
Similar Articles
5
Enabling Cloudflare services in cPanelTutorials • Cloudflare | cpanel | cloudflare | protection
This article will describe the steps required to enable Cloudflare services for domains hosted on your cPanel control panel
by Mihai BobriucViews 1443Updated now 10 monthsPublished 26/09/2017
1
Adding an MX record to the cPanel admin panel, redirecting your mail server to GoogleTutorials • Email | mx | mx records | mx registration | dns | email
How to add MX Records and forward mail to the Google mail server
by Mihai BobriucViews 1459Updated now 1 yearPublished 21/07/2017
1
Enable DNSSEC in ROTLDTutorials • Domains | dnssec | domain | rotld
This tutorial will describe the steps required to enable DNSSEC on a .ro domain in the ROTLD panel
by Ana RednicViews 1004Updated now 1 yearPublished 25/10/2018
1
Changing the PHP version in cPanel on VPS hosting packages through MultiPHP ManagerTutorials • cPanel | multiphp manager | cpanel | php | version | vps
In this article we will present the required steps to change the PHP version in a cPanel account through MultiPHP Manager
by Ana RednicViews 817Updated now 1 yearPublished 25/10/2018
Installing an application through cPanel Softaculous pluginTutorials • Softaculous | softaculous | wordpress | install | cpanel | plugin | cms | application
This article will describe the steps you need to install an application through the cPanel Softaculous plugin.
by Ana RednicViews 1005Updated now 1 yearPublished 25/10/2018