Tutorials • Plesk
Creating a database in the Plesk panel
Find out how to create a database and a user in Plesk. Follow the simple steps for efficient configuration of your database.
Views 704Updated 1 anPublished on 20/12/2019by Cătălin A.
Introduction
This article explains the steps that need to be followed to create a database and a user for it in a Plesk hosting account.
Requirements
- an active Plesk hosting account
- login data in the panel
Steps to Follow
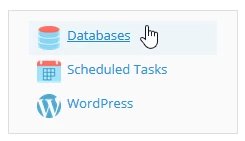
- after logging into the Plesk control panel, in the displayed interface select "Databases" located in the top right corner of the panel
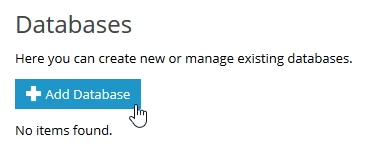
- On the next page, select the "Add database" button
- In the page that will be displayed, the fields will be filled out as follows:
- "Database name" - the name of the database
- "Database server" - displays the server, the connection port, and the installed MySQL version on the server
- "Related site" - select the domain with which the database will interact
- "Create a database user" - the checkbox remains checked for creating the user database
- "Database user name" - the username attached to the database
- "New password" - the user's database password
- "Confirm password" - the password set by the user is confirmed
- "User has access to all databases within the selected subscription" - this is checked only if you want this user to have access to all databases associated with the account
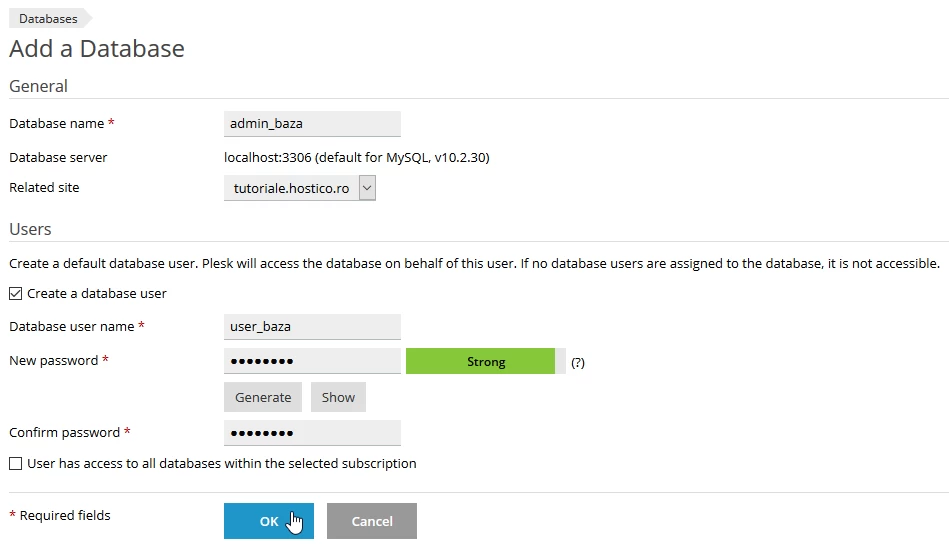
- after filling in the fields, the "OK" button located at the bottom of the page is selected
- later a confirmation message will be displayed
![]()